Food Processor Tips
Back in the 1980s, food processors became one of the most popular kitchen appliances of all time, hailed as the ultimate kitchen tool that would replace blenders, mixers, knives, and choppers. However, many home cooks were overwhelmed by the machines’ powerful motors, unfamiliar attachments, and razor sharp blades and food processors got pushed to the back of the cupboard to gather dust.
Food processors really are amazing machines if you know how to use them. They can actually save hundreds of hours a year spent slicing, chopping, dicing, mincing, shredding, mixing, pureeing, and kneading using manual tools or other small kitchen appliances. These BigOven tips will give you more time to build your online recipe collections and make cooking and baking easier and more enjoyable.
The Attachments
The majority of food processors come with one or two shredding discs, a slicing disc, a metal blade, and a plastic dough blade. The shredding and slicing discs sit upright from the bottom of the work bowl with the blades near the lid, and the blades attach to the bottom of the bowl. The lid typically has a feed tube into which you place food for the shredding and slicing discs or drop food through for processing by the bottom blades. Use the metal blade to chop, mince, and puree foods and the plastic one to mix and knead dough. All these attachments make food preparation faster and ensure consistency in the shreds, slices, and morsels they create.
Food Temperature
Cold food works best in food processors because it is firmer and less likely to deteriorate when processed. The blades are so finely honed they pulverize warm or soft food instead of creating the desired shreds or cuts. Put cheese, meat, boneless poultry, dried fruit, nuts, and chocolate in the freezer for 15 to 30 minutes before shredding or chopping. The same applies to food being dropped through the feeding tube to be chopped by the bottom cutting blade.
Power Plays
Food processor motors are much more powerful than those in blenders or stand mixers. When chopping foods placed directly into the work bowl on top of the metal blade, pulse the motor on and off until the desired consistency is reached. Turning the machine on and letting it process continuously pulverizes rather than chops ingredients. Empty the bowl before adding more food to ensure consistency.
Tube Tips
Shredding partially frozen cheese is incredibly easy and fast with a food processor. Secure the shredding disc onto the center knob, lock the lid in place, and place a chunk of cheese just slightly smaller than the opening into the food tube. Place the plunger on top of the cheese and push down with steady, even pressure when you engage the motor. To slice raw fruit and vegetables or partially frozen raw or cooked meat and poultry, insert the slicing blade following the same procedure and stack the food in the chute atop the blade. Smaller vegetables such as carrots can be lined up side-by-side in the chute to create evenly cut rounds. It’s important to stack foods securely in the food chute with little room for play so they don’t move around as they hit the blade and cut odd shapes and sizes. Periodically empty the food bowl to prevent compaction.
To grate hard cheese such as Parmesan or Romano, chop nuts, or mince garlic, insert the metal blade on the bottom of the work bowl. Turn on the machine and drop cheese chunks, nuts, or garlic cloves through the food tube with the blade engaged. This prevents the food from lodging under the blade and produces evenly grated, chopped, or minced results.
Kneading and Mixing
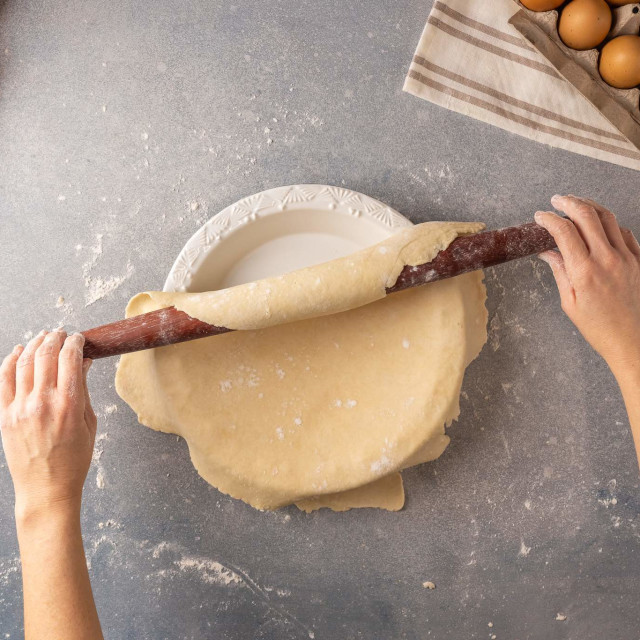
Nothing is easier than making pie crusts, bread, and cake batters in a food processor. For fast and flawless pie crust, add 3 ½ tablespoons ice water and 4 tablespoons butter to a work bowl fitted with the metal blade on the bottom. Pulse several times (excessive pulsing will heat up the butter and ruin the recipe), add 1 cup of flour all at once, and process until a ball forms, which typically takes less than 30 seconds. Wrap the ball and refrigerate for at least an hour before rolling out. To reduce manual kneading time for bread, place the dry ingredients into the bowl fitted with the plastic dough blade and pulse a couple of times to blend. Proof the yeast in warm water and when it’s foamy, mix it with the other wet ingredients, and pour through the tube while the processor is running. Do not process more than 30 seconds. Gradually add flour until a ball forms and then knead the dough for a minute or two by hand before starting the rising process. For cake batters, mix the dry ingredients first with the metal blade on the bottom and add the wet ingredients. Pulse several times until the ingredients are well incorporated, scraping the sides a few times to make sure all the components are thoroughly mixed.
Although food processors can’t totally replace blenders, stand mixers, and kitchen knives, they save significant time in food preparation. They are also easy to clean by hand or in a dishwasher. If you are still hesitant to use your food processor, start by experimenting with cutting vegetables for a soup or stew that can still be used if they are inconsistent in size and shape before moving on to more complicated culinary tasks.