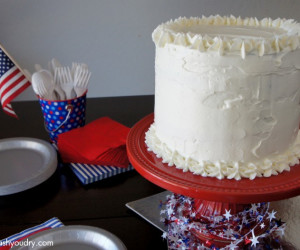
All American Cake
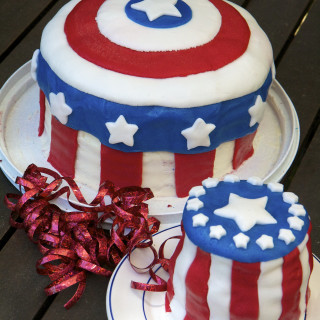
Festive and patriotically themed cake with a surprising interior.
Still searching for what to cook ?
Find the most delicious recipes here
INGREDIENTS
- 6 Boxes White Cake mix ; Duncan Heinz
- 2 Tubs Cream Cheese Frosting
- 2 Cans Raspberry Pie Filling ; 12oz. Size
- 1 pound White Fondant
- 1/2 Pound Blue Fondant
- 1/2 Pound Red Fondant
- 2 Vials Food Coloring ; AmeriColor Super Red
- 2 Vials Food Coloring ; AmeriColor Royal Blue
- 1 Vial Food Coloring ; AmeriColor Super Super White
- 18 Egg whites
INSTRUCTIONS
Mise en Place:
•Preheat oven to 325°F
•Set eggs out to warm to room temp
•9" nonstick round cake pans (2 min.) with cake strip insulators
•Cake leveler saw
•Wooden rolling pin and plastic table cloth remnant to roll fondant out on
•Frosting decorator gun or pipe with fine bead round tip
•Frosting spatulas
•Cooking spray
•Parchment paper
•Heavy weight photo paper (moisture resistance is required, so don't use in coated paper) torus template, with 8.5" outside diameter (9" cake shrinks to about 8.5" when cooked and cooled) and 5.1" smaller inside diameter (equal to 3/5 the total diameter to make the correctly proportioned blue field of 2/5 the total diameter). Lightly spray paper with cooking spray to prevent cake sticking.
•Large and small star cookie cutter shapes
1. Prepare one box of white cake per directions. Add blue dye, about 3/4 of bottle to make bright deep blue. It will darken when cooked.
2. Lightly spray cake pans and wrap with cake strip insulators soaked in cold water. Divide mixture evenly between pans. Use spatula to spread evenly out along whole bottom (this step affects the finished thickness of the cake for yielding more usable pieces after cutting later). Cook as directed on box, usually 25-29 minutes at 325°F, centered rack. *
3. When done (confirm with toothpick test at middle and edges), remove to counter to cool for 10 minutes while preparing the next batch. Repeat step one for next box of mix, including the blue coloring. The now partially cooled cake can be upended onto tap square of parchment paper**. Clean and respray the pans and fill as before, place in oven.
4. Repeat this same procedure for 2 boxes mixed with red*** and two boxes of white**** mixed with the whitener dye.
5. Cut the fully cooled layers into 1/2" thick layers and lay aside on parchment.§
6. Cut smaller circles of white and red, and and toruses of blue layers, set aside on parchment. (see § & §§ in notes).
7. Place the first most even 1/2" thick red layer on the cake serving platter, centered, using the parchment to aid in transfer. Apply a thin layer of the raspberry filling to adhere the next layer to §§§. Be mindful of stray crumbs as you proceed (contaminant color).
8. Do the same for alternating white and red layers (3 red and 2 white). Next place blue torus on the raspberry filling topped full red layer, carefully aligning with the perimeters below. Use the frosting decorator to pipe out thin white frosting concentric rings, alternating 3 and 2 rings on each interlayer (none on the very top layer).§§§§ A white circle layer fills the middle and more raspberry is applied only to this center piece. Continue pattern for total of 4 layers blue and two each of white and red, topping with the red color.
9. Using a sharp thin bread or filet knife, trim the sides of the cake plumb and even, discard remainders. Frost with thin layer of white frosting to create additional binder and as a base for fondant to cling to. Clean serving platter when complete.
10. Roll out each color of fondant, approximately 1/8" thick. Cut to shapes using knife and cookie cutter shapes. Apply to cake, starting with vertical stripe, anchored later by top decorations.‡ Add star shapes and serve.
Enjoy the strong reaction to this graphically bold cake decoration. Really soak in the amazement when you first cut it open to expose the flag cross section.
NOTES
For the red portions of the cake, substitute Red Velvet cake mix for a deeper richer red (this version will be darker and less vibrant than dyed white cake. But, shortcuts are good, this cake takes an extreme amount of time to prepare! Especially if things go wrong (as they have both times I've made this cake).
I usually split the work into two days. Build cake first day, refrigerate. Next day, close to presentation time, prepare and apply the fondant so it has less time to slump and slide. Keep refrigerated till last minute to limit movement. Do not freeze (expansion contraction will cause the fondant to come off).
The cake is quite tall and heavy. It can shift under its own weight and depending on how tilted any of the layers are. Use dry spaghetti to stab into the middle from the top to temporarily stabilize during transport, remove before serving.
*Don't use convection (which can dry the cake out too much). Take a break between cakes, it is best not to premix the next batch which would be left standing too long.
**Use parchment paper to aid in moving the various layers and pieces around.
***For red use full vial each for these for maximum red color intensity (about half as much if using Red Velvet cake), again, it will look pink, but will darken nicely when cooked and cooled.
****About a half vial each or whitener.
§As the cakes cool use the cake leveler saw to cut each layer in half, approximately 1/2" thick. My cake saw only goes down to 1" so I put the cake on a 1/2" thick cutting board while the saw feet remain on the counter. Note that there is a reason the cake saw only goes down to 1"—the cut layers become very fragile to handle—take great care not to damage. Use the saw with short rapid strokes to avoid drag and tearing of the cake. Transfer the new cut top layer of each section to another square of parchment paper. I do this by folding and sharply creasing the leading edge and gradually sliding it between the freshly cut pieces, slowly working it under. As the pieces are cut I accumulate them is a stack to avoid too much expiration of moisture. Some pieces, despite your best efforts, will come out tapered or torn, I sort these into an alternates pile (there will be left over waste pieces of the cake in order to produce the flag profile).
§§Select the best 4 layers of blue cake and cut the middle circle out (which can be discarded or used to make a second smaller decorated cake later with remainder frosting and fondant). Set aside the resulting toruses (tori?). Select 2 each from the remainder red and white layers, if any, or from the good cut layers, and use the template to cut out small circles from the portions with the most even 1/2" thickness (it is OK to go off center to accomplish this, as all of the remainder will be discarded). Set the small circles aside, stacked to retain moisture. Keep all pieces on separate squares of parchment paper.
§§§ Avoid too thick a layer as this will function more like a lubricant than an adhesive and could lead to layers sliding later on.
§§§§The frosting forms stars when cut through. The key is to keep the bead narrow. this can be helped by using a toothpick held at an oblique angle to drag a thin circular depression in the blue cake in the desired location, into which the white frosting is piped.
‡Lap the vertical stripe over the top corner of the cake so that the top "shield" decorations lay over them to anchor and prevent them from later falling off cake. Thinner fondant is lighter but becomes more fragile, Get the vertical stripes as thin as possible so their weight is lower.

Patriotic, festive and good tasting
![]()
![]() me2earth
me2earth
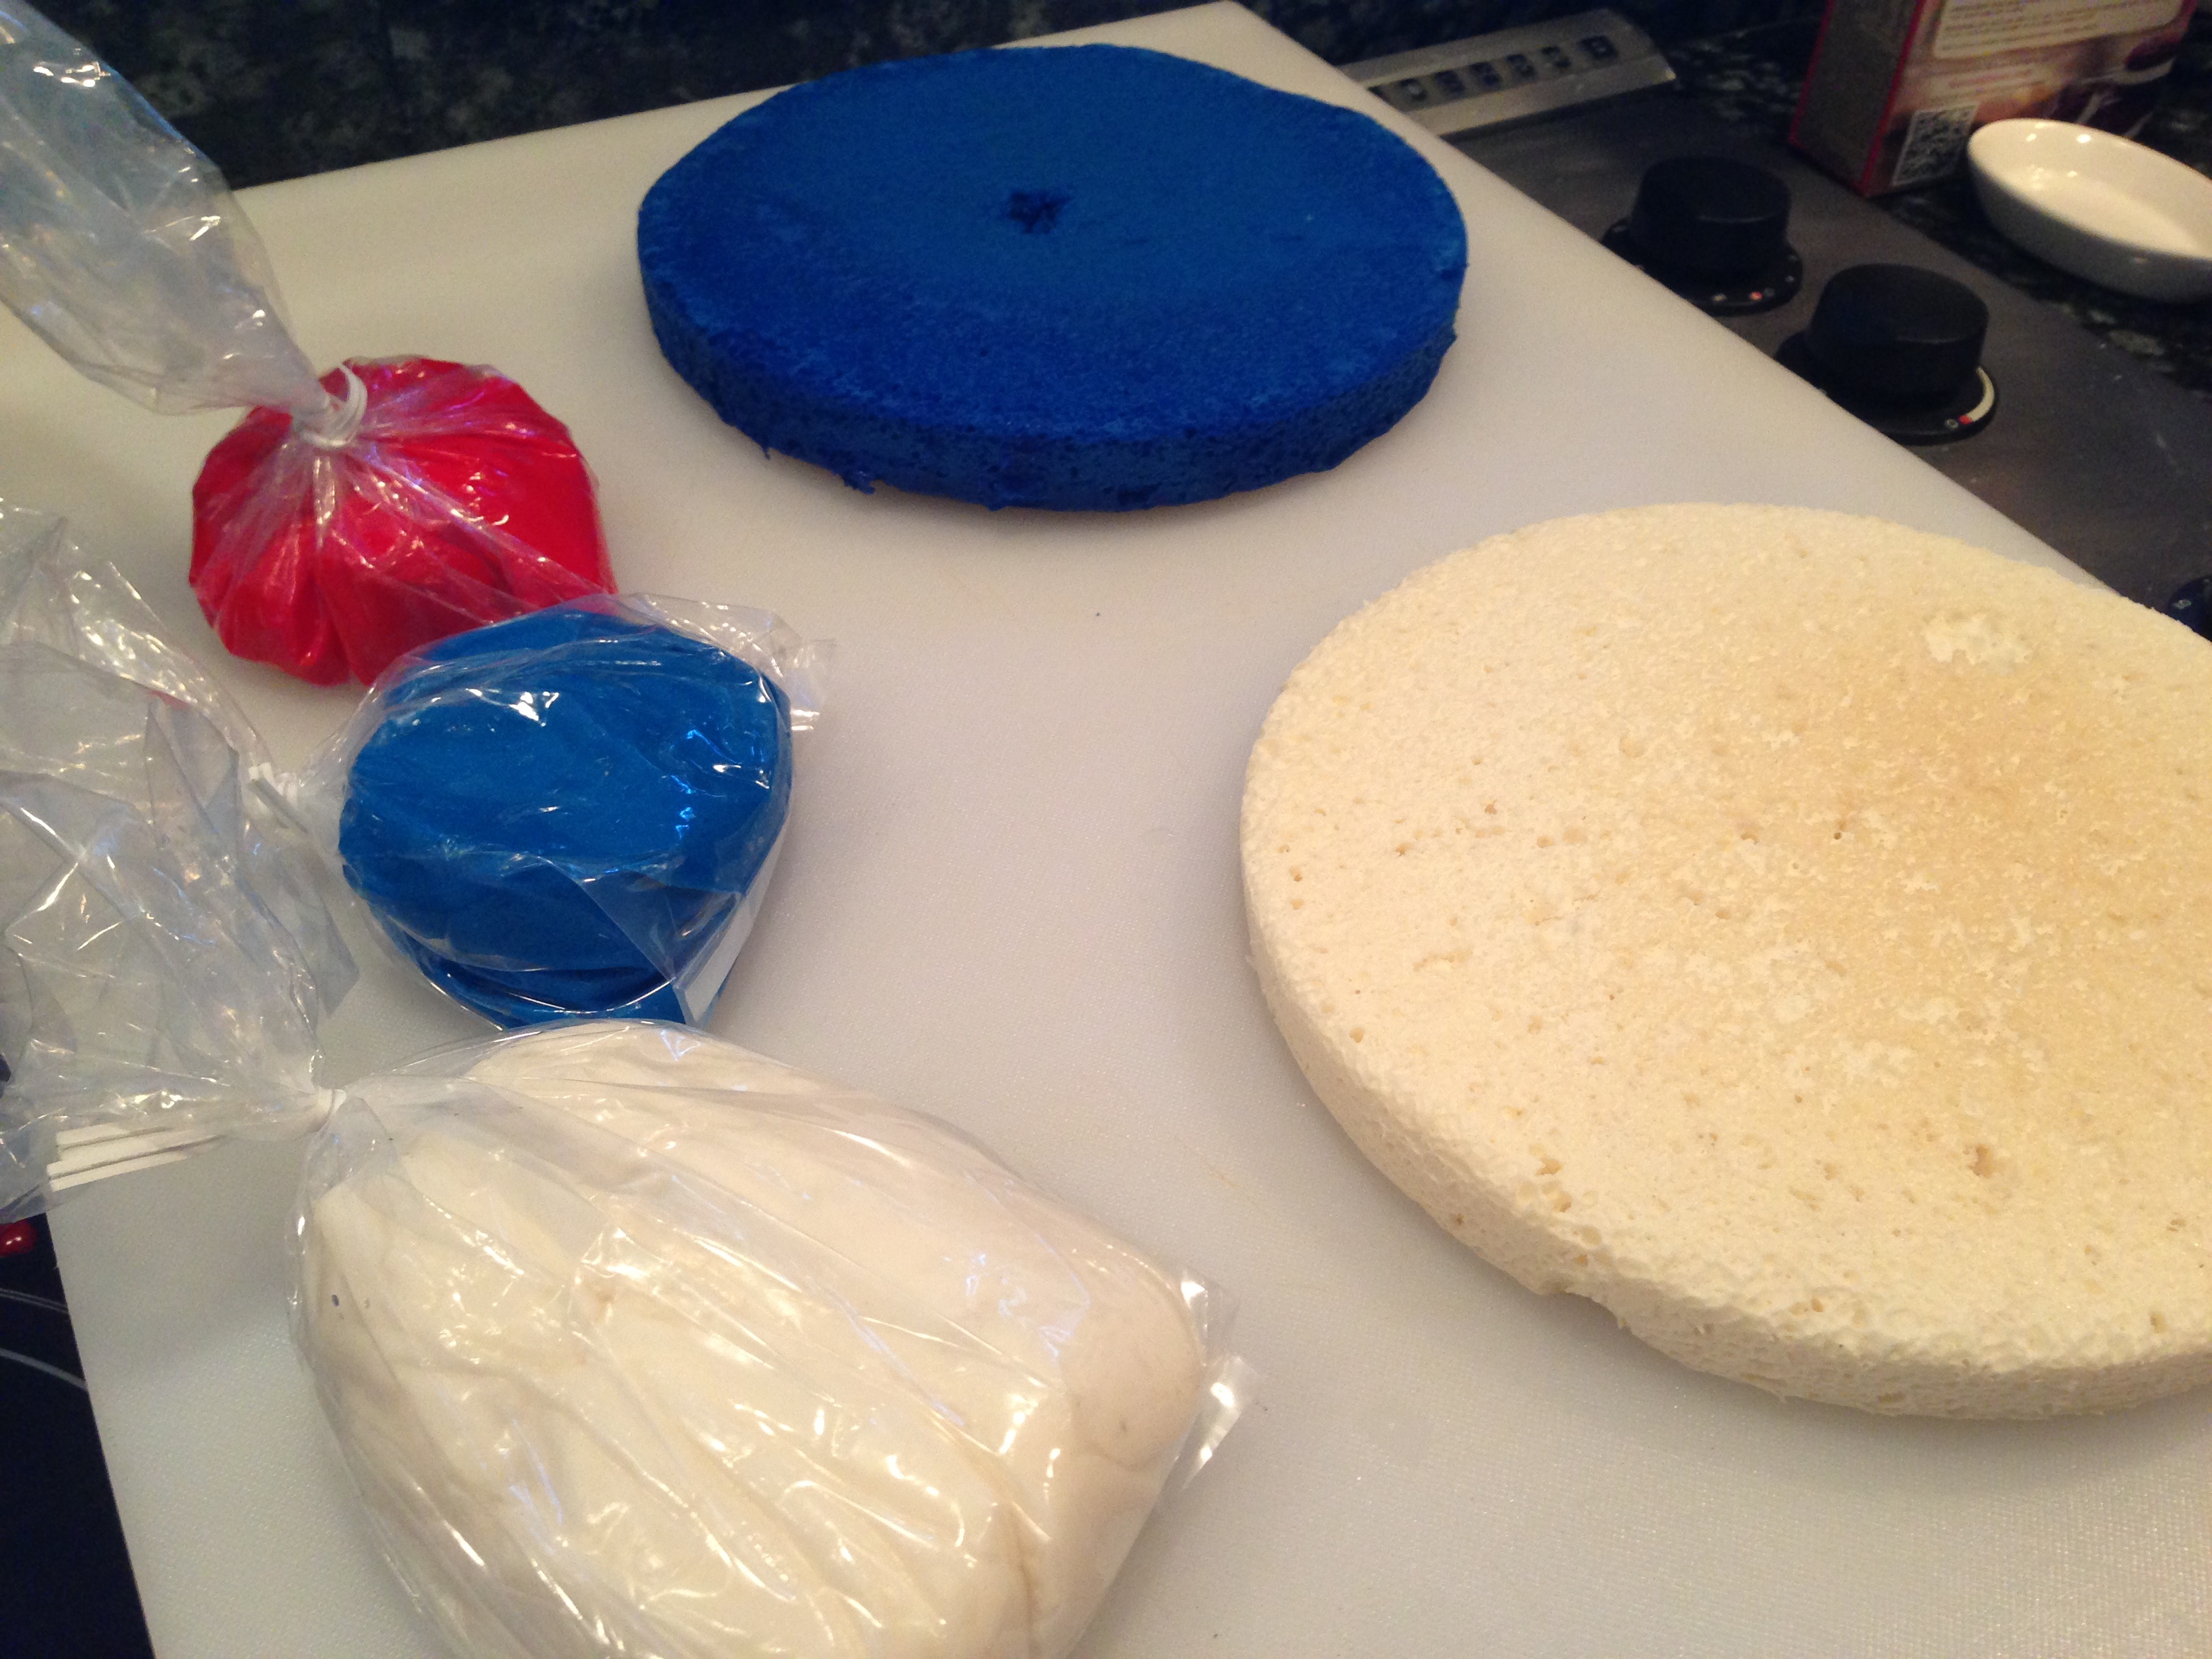
Fondant and cut layers
![]()
![]() me2earth
me2earth
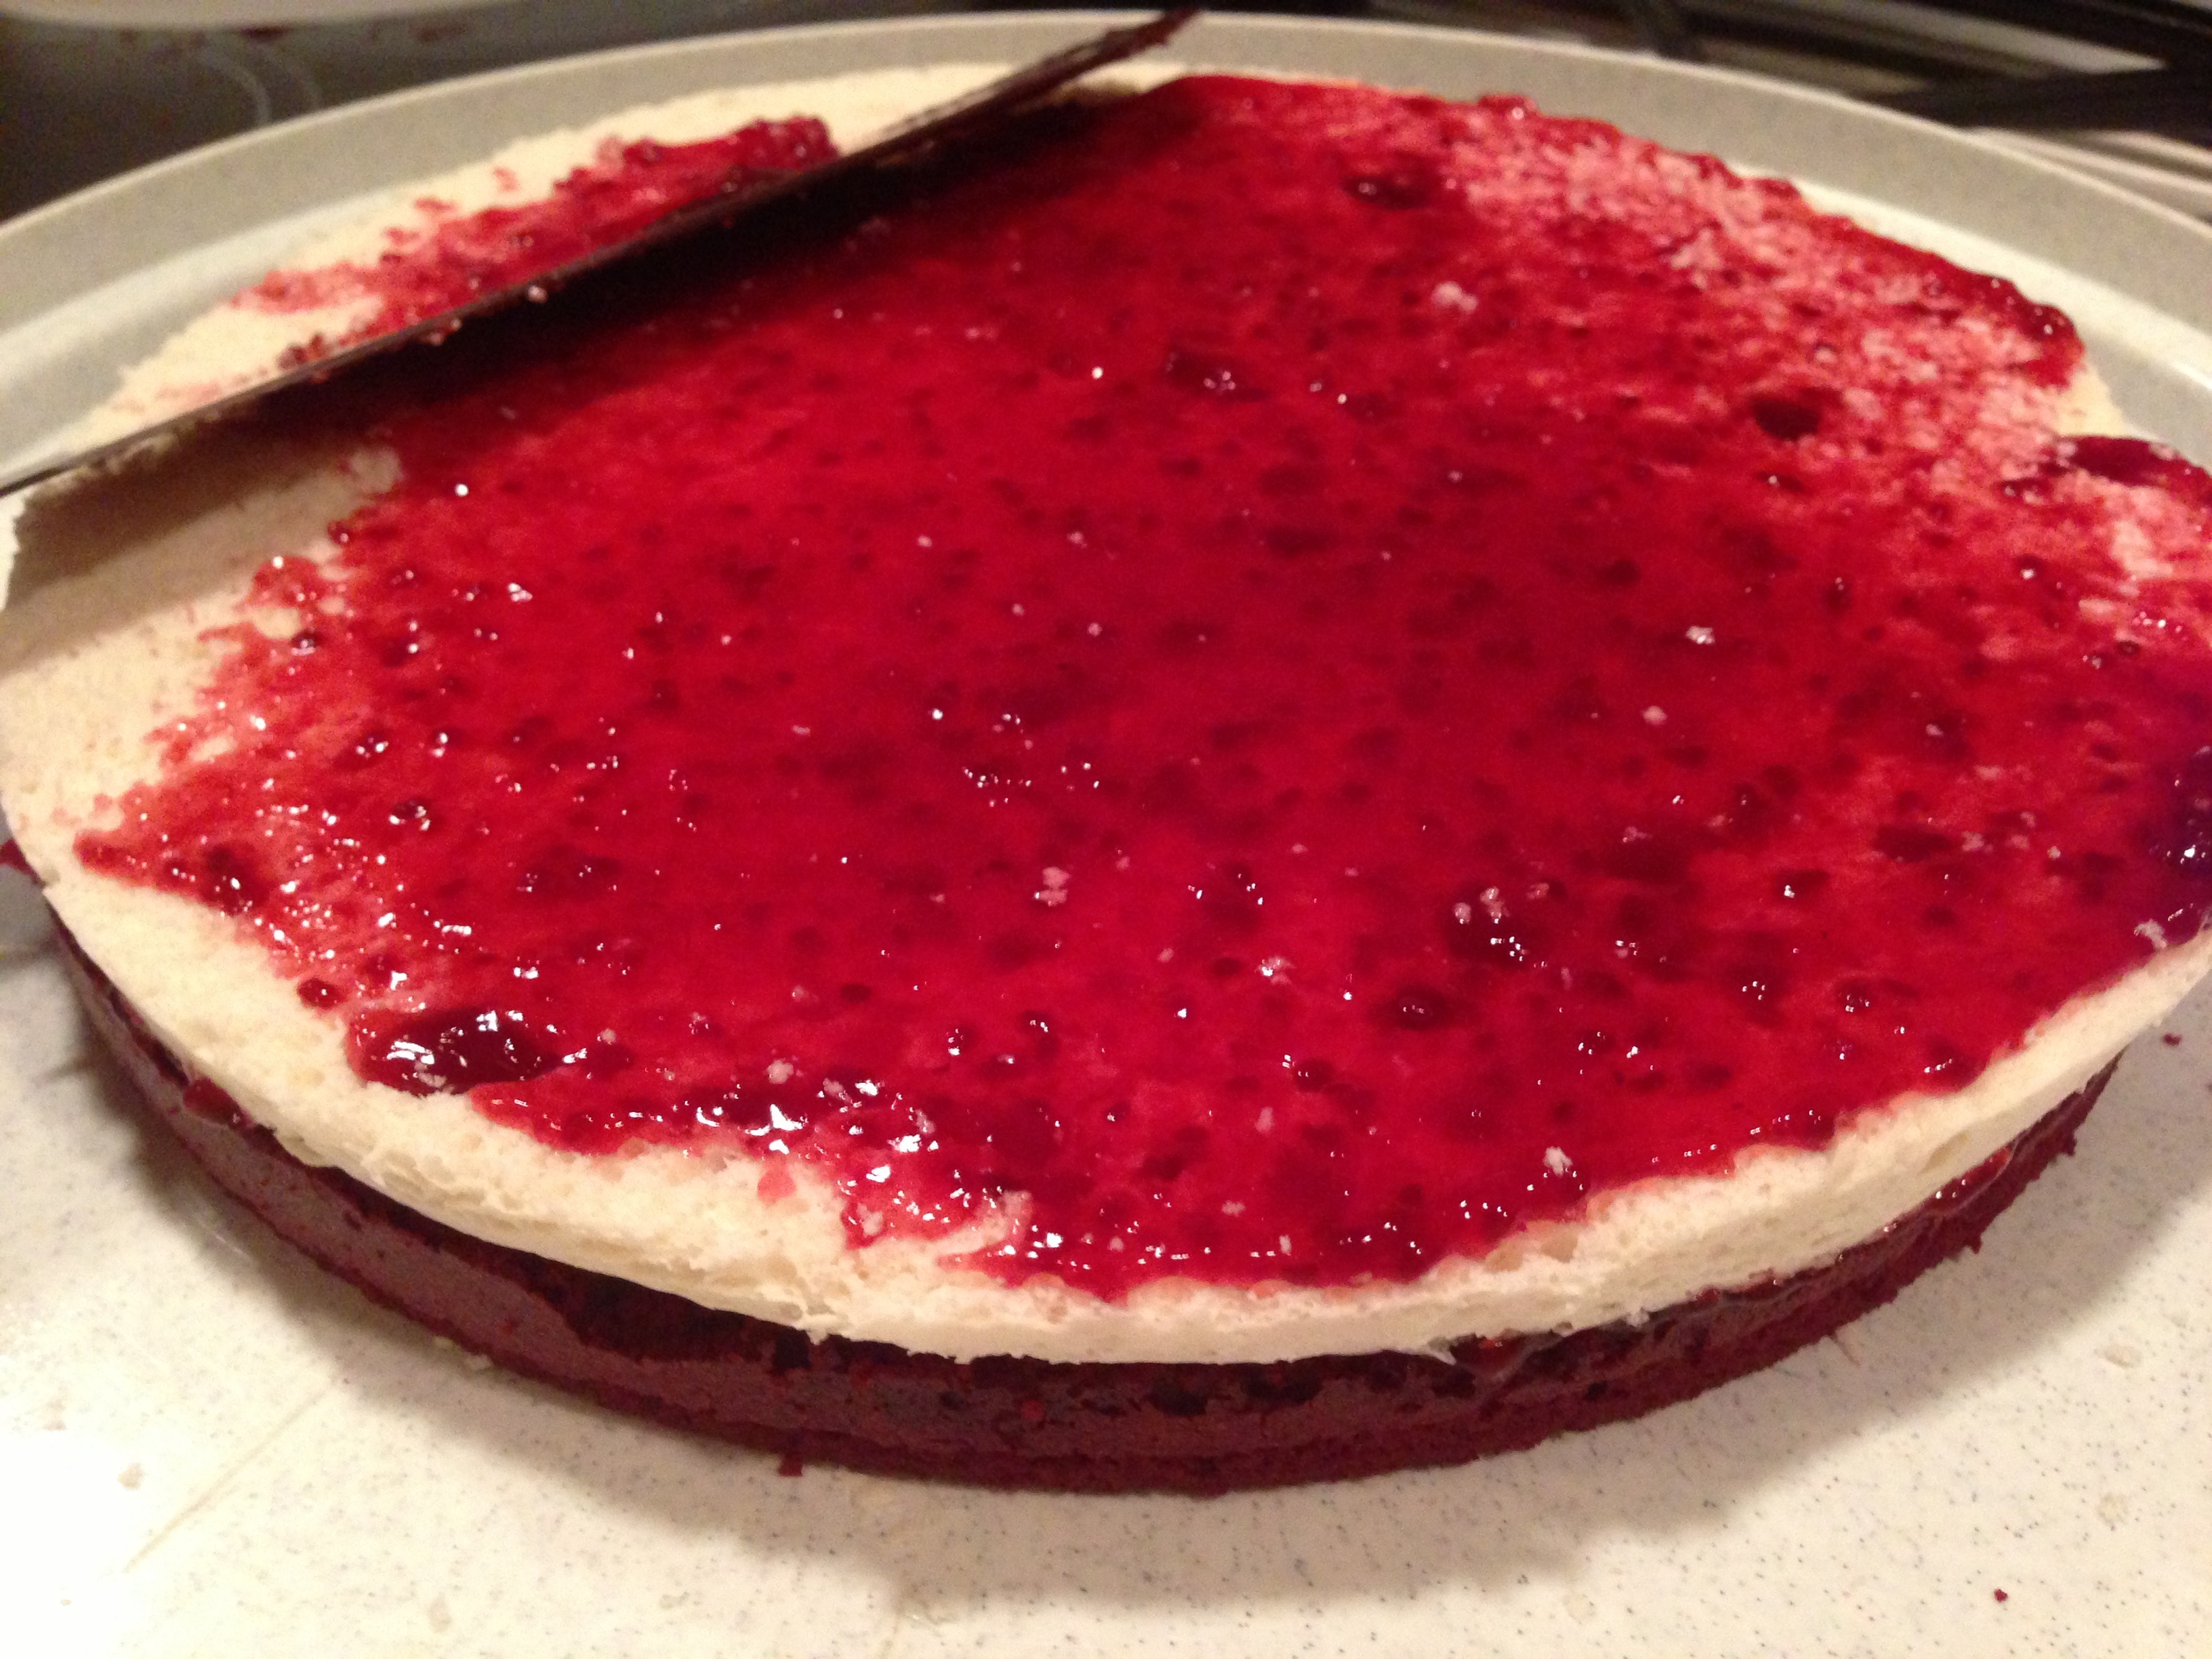
Apply thin layer of filling between layers
![]()
![]() me2earth
me2earth

Layer progression
![]()
![]() me2earth
me2earth

The star frosting is added…
![]()
![]() me2earth
me2earth
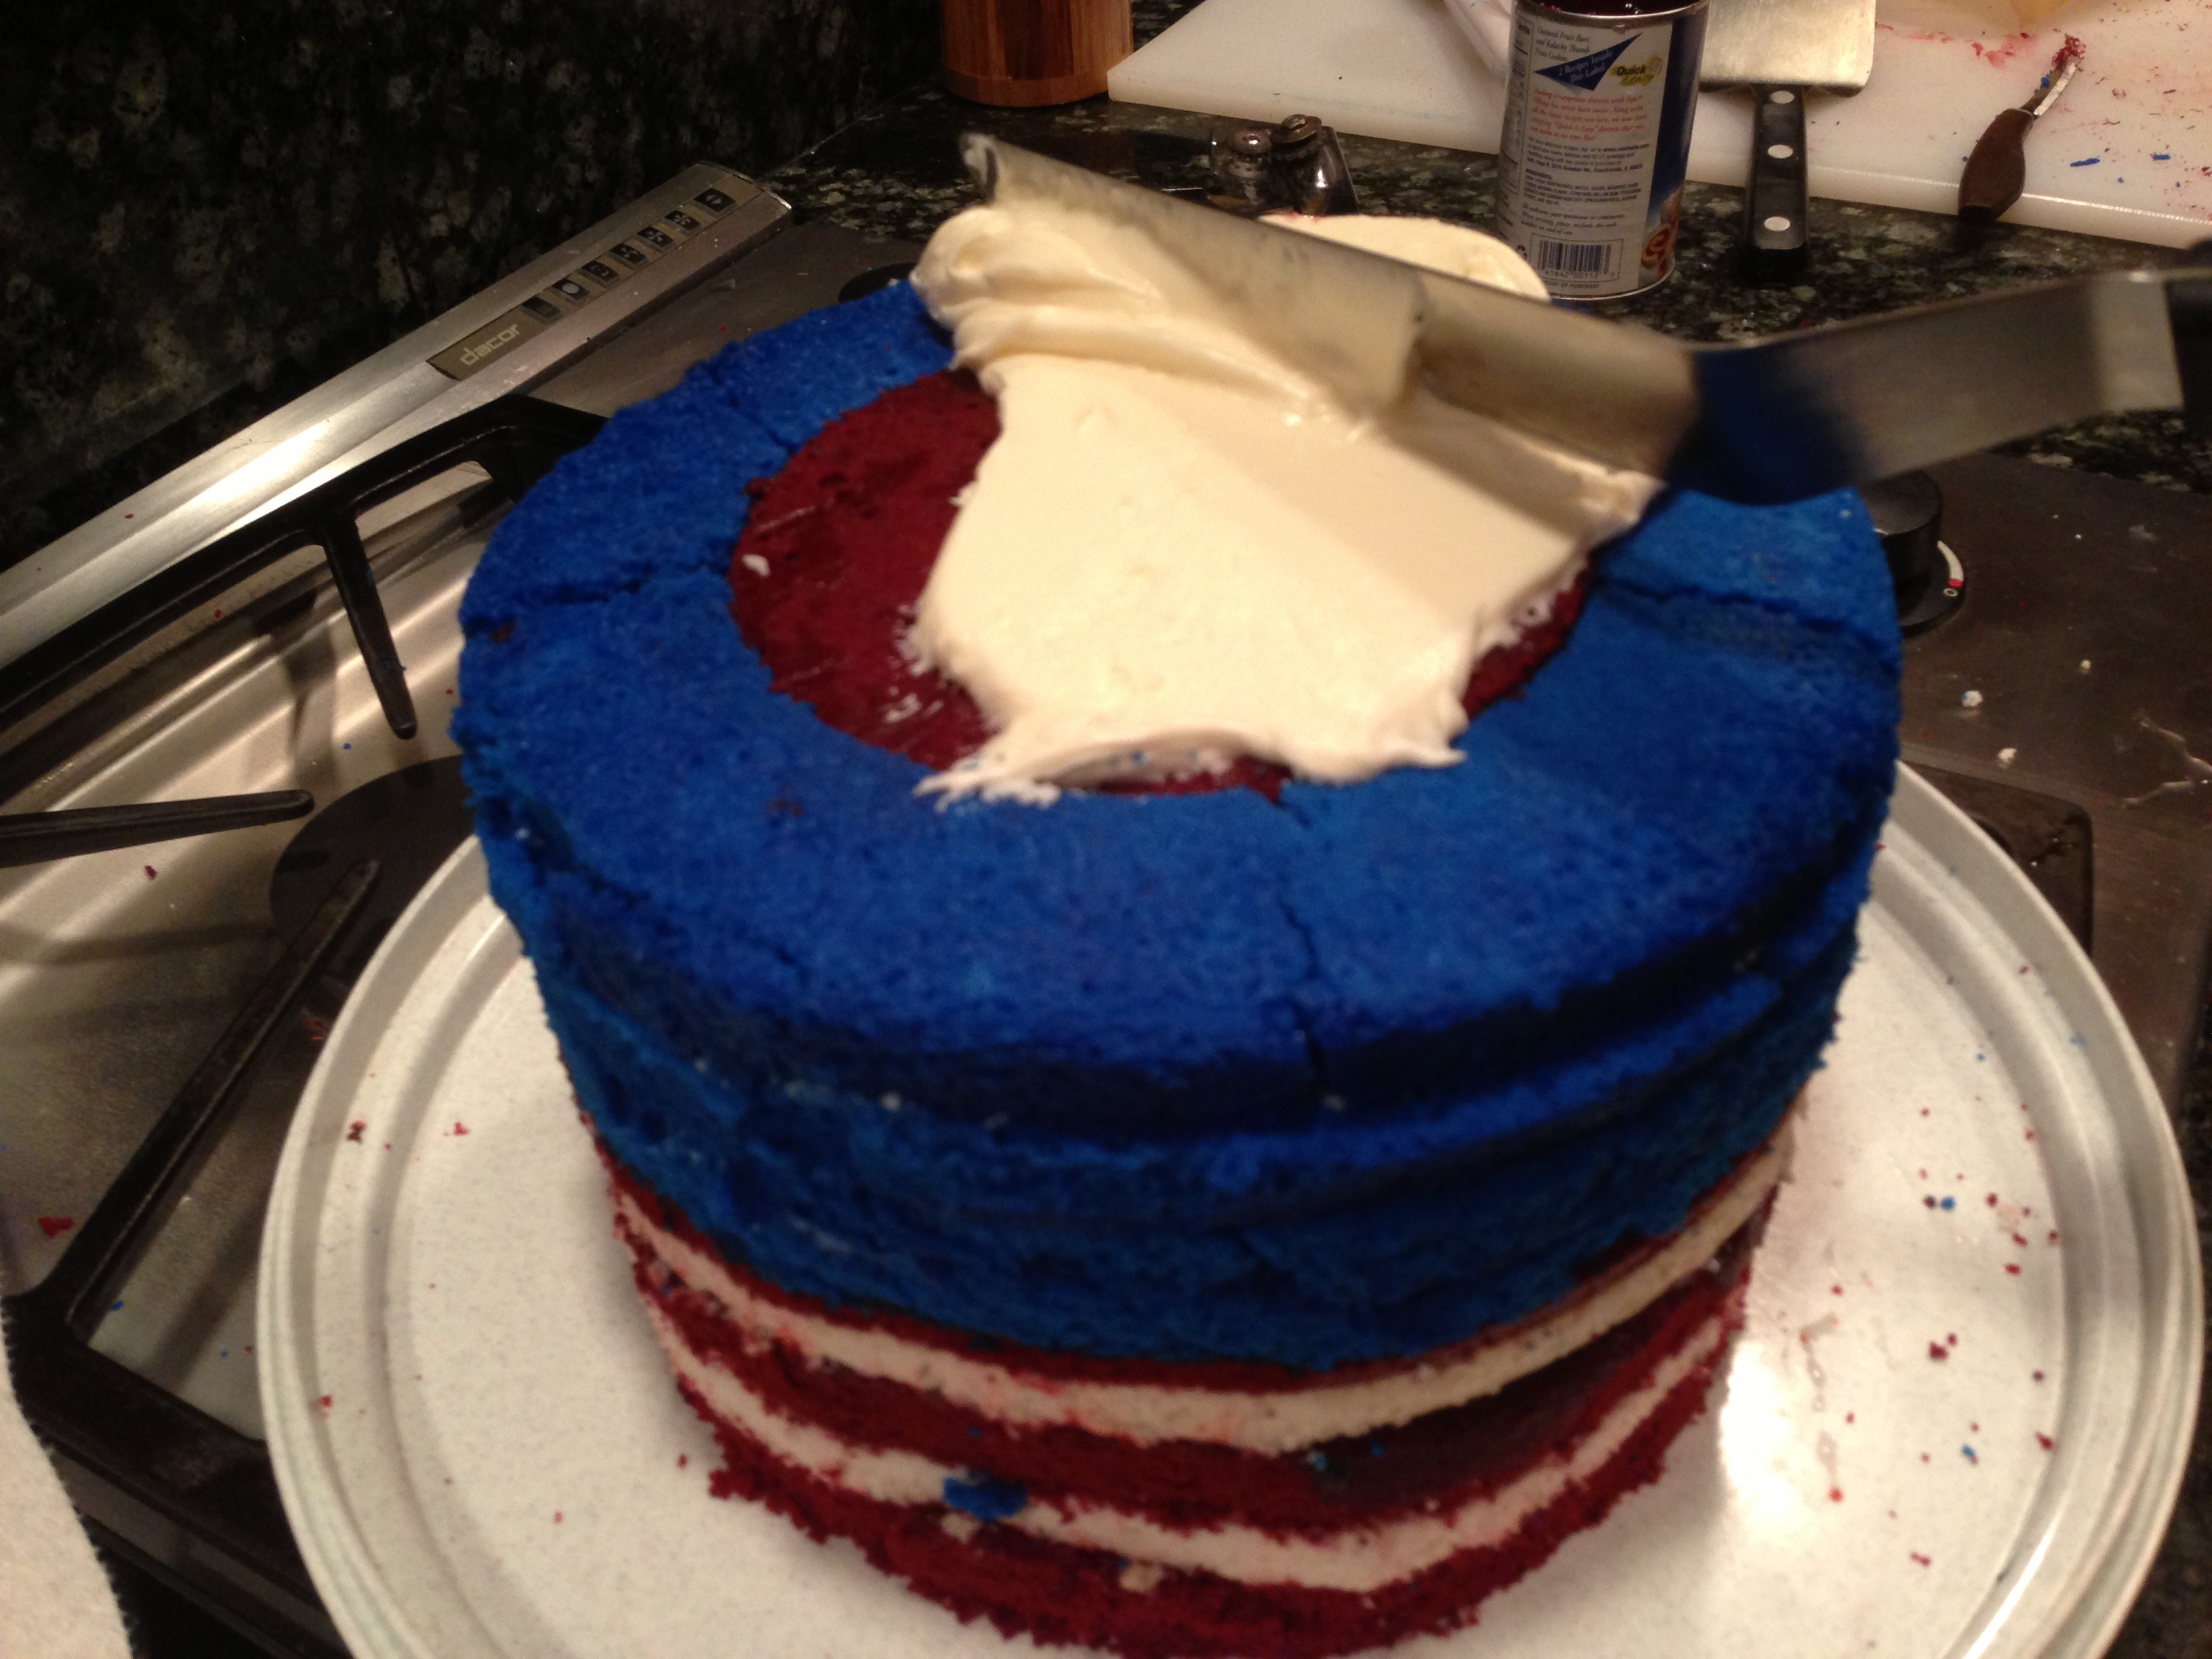
A thin layer of frosting is applied to bind the pieces together
![]()
![]() me2earth
me2earth
Nutrition
View line-by-line Nutrition Insights™: Discover which ingredients contribute the calories/sodium/etc.
|
|
||
| Serving Size: 1 Serving (125g) | ||
| Recipe Makes: 12 Servings | ||
|
|
||
| Calories: 165 | ||
| Calories from Fat: 1 (1%) | ||
|
|
||
| Amt Per Serving | % DV | |
|
|
||
| Total Fat 0.1g | 0 % | |
| Saturated Fat 0g | 0 % | |
| Monounsaturated Fat 0g | ||
| Polyunsanturated Fat 0g | ||
| Cholesterol 0mg | 0 % | |
| Sodium 86.3mg | 3 % | |
| Potassium 82.2mg | 2 % | |
| Total Carbohydrate 35.6g | 10 % | |
| Dietary Fiber 0g | 0 % | |
| Sugars, other 35.6g | ||
| Protein 5.4g | 8 % | |
|
Powered by: USDA Nutrition Database Disclaimer: Nutrition facts are derived from linked ingredients (shown at left in colored bullets) and may or may not be complete. Always consult a licensed nutritionist or doctor if you have a nutrition-related medical condition. |
||
Calories per serving: 165
Get detailed nutrition information, including item-by-item nutrition insights, so you can see where the calories, carbs, fat, sodium and more come from.
MORE IDEAS


REVIEWS
There are no reviews yet. Be the first!
What would you serve with this? Link in another recipe.