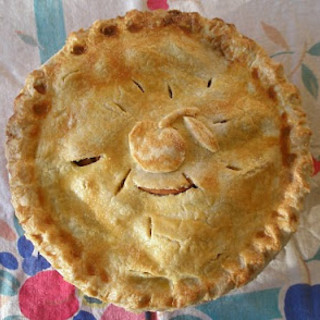
Gluten-free Pie crust
Try this Gluten-free Pie crust recipe, or contribute your own.
Suggest a better descriptionStill searching for what to cook ?
Find the most delicious recipes here
INGREDIENTS
- Jeanne’s Gluten-Free All-Purpose Flour Mix
- 1 1/4 cups brown rice flour
- 1 1/4 cups white rice flour
- 1 cup tapioca flour
- 1 cup sweet rice flour ; (also known as Mochiko)
- 2 scant teaspoons xanthan gum
- Pie crust
- 2 1/3 cups Jeanne’s Gluten-Free All-Purpose Flour Mix
- 1 tablespoon sugar
- 1/4 teaspoon salt
- 1 cup butter or lard ; cold and cut into pieces
- 1 tablespoon vinegar
- 5-7 tablespoons cold water
- extra tapioca flour ; for rolling out
INSTRUCTIONS
First, make the filling for your pie. I have two for apple pie that you can find here. Set the filling aside at room temperature while you’re making your crust.
To make the crust:
Place flour, sugar, and salt into a large bowl. Mix together with a spoon until combined. Add butter pieces to the dry ingredients mixture. With fingers, start rubbing together the butter and the dry ingredients. This will take some time. Do this until the resulting mixture looks like wet sand mixed with pebbles. I like to do this by hand to get a feel for the dough.
Add the vinegar and rub into the mixture. Add water a TBL at a time, rubbing into the mixture. You want to add enough to create a dough that holds together well, but isn’t wet. During the winter here in Seattle, I’ve consistently used about 6 TBL. During the summer I’ve used closer to 5 TBL.
Divide the dough into two fairly equal pieces, shape into disks, and wrap each disk separately in plastic wrap. Refrigerate the disks for 20-30 minutes (or until the disks are cool and nicely firm but not hard).
Prepare your rolling surface. Sprinkle tapioca flour over your rolling surface. Also sprinkle flour over your rolling pin. When the disks are chilled, remove the first disk of dough from the fridge and place on your prepared rolling surface and sprinkle top of dough with tapioca flour. The key to successfully rolling out gluten-free pie dough is to go slow. When I say slow, I mean SLOW. And with a light touch. If your dough starts cracking, slow down and don’t press so hard with your rolling pin. With your rolling pin, carefully and patiently roll out the dough into a 12? circle (it should be at least 3? larger than the top of your pie pan). If the dough sticks to the rolling pin, add more tapioca flour.
NOTE: the dough should be cool but not too cold. It should roll fairly easily and should not break while you’re rolling it. If it does break a bit, don’t worry–breaks are easily fixed by smoothing the dough over the breaks. If it seems too cold and you’re really having to work hard to roll it and it’s breaking a lot, step back and let it warm up a little bit before you continue. Alternately, if the dough is floppy and seems to be “sweating,” it is too warm and should be refrigerated for awhile longer.
Sprinkle tapioca flour over the entire surface of the pie crust dough. Now, put the rolling pin on top of one side of the dough. Wrap the dough around the roller until you’ve gotten all of the dough onto the pin. The dough should roll easily around the pin without any breaking. NOTE: again, if the dough breaks a lot while you’re rolling it around the pin, it’s a bit too cold. Step away and let the dough warm up a bit before proceeding
Lift the pin with the dough rolled around it and put on the top of your pie pan. Unwrap the dough from your rolling pin onto the pie pan so the pan is covered evenly. Now carefully press your dough into place. Proceed slowly, starting with the middle bottom of the pie pan and working out to bottom corners and then up the sides. When you get to the rim, press the dough onto the rim. Finally, press down and carefully tear off any leftover dough.
Place your pie pan with the bottom crust dough in place into the refrigerator while you roll out the top dough.
Preheat your oven to the temperature required for your chosen pie filling.
Roll out the top dough the same way you rolled out the bottom dough.
Remove pie pan w/dough from refrigerator. Place filling inside it and dot with cold butter pieces. Roll top crust dough onto your rolling pin just as you did with the bottom crust dough. Transfer and unroll over the top of your pie filling.
Carefully press top and bottom crust dough together at the rim to form a seal.
If you want a little bit of a glaze on top of your pie, I recommend using some beaten egg to brush on the top and then sprinkle with granulated sugar.
NOTES
http://www.artofglutenfreebaking.com/2009/11/pie-crust-gluten-free-refined-71210/
Nutrition
View line-by-line Nutrition Insights™: Discover which ingredients contribute the calories/sodium/etc.
|
|
||
| Serving Size: 1 Serving (56g) | ||
| Recipe Makes: 8 Servings | ||
|
|
||
| Calories: 5 | ||
| Calories from Fat: 0 (0%) | ||
|
|
||
| Amt Per Serving | % DV | |
|
|
||
| Total Fat 0g | 0 % | |
| Saturated Fat 0g | 0 % | |
| Monounsaturated Fat 0g | ||
| Polyunsanturated Fat 0g | ||
| Cholesterol 0mg | 0 % | |
| Sodium 0mg | 0 % | |
| Potassium 0.1mg | 0 % | |
| Total Carbohydrate 1.1g | 0 % | |
| Dietary Fiber 0g | 0 % | |
| Sugars, other 1.1g | ||
| Protein 0g | 0 % | |
|
Powered by: USDA Nutrition Database Disclaimer: Nutrition facts are derived from linked ingredients (shown at left in colored bullets) and may or may not be complete. Always consult a licensed nutritionist or doctor if you have a nutrition-related medical condition. |
||
Calories per serving: 5
Get detailed nutrition information, including item-by-item nutrition insights, so you can see where the calories, carbs, fat, sodium and more come from.
MORE IDEAS


REVIEWS
There are no reviews yet. Be the first!
What would you serve with this? Link in another recipe.